Showing posts with label fancy. Show all posts

Saturday, September 19, 2009

The Best Risotto EVER!!!

As I mentioned in my last post, Damien came home yesterday, so I decided to try and make something a little special. As an ode to my adorable little boy, I broke out the Balthazar Cookbook.

While it is slightly embarrassing to admit, Baz is named after our favorite New York City restaurant, Balthazar. Sure there were other reasons too, but the main one is that we used to go to this restaurant for special occasions, when my parents were in town and paying for dinner or when we just wanted to splurge on a really great meal. When we began the name search for our boy, we were thinking of meaningful places we had been and Balthazar came up.

I started going there when it first opened in 1997. On my first visit, I was alone and sat in the bar area for lunch. It was so extravagant for me. I was just a lowly advertising assistant making maybe $20,000 a year, including the late night meals and cab rides they'd pay for when I worked past 8pm. But, I ordered a steak frite, a glass of red wine and took in the awesome scene while documenting it in my journal. After I'd spent a good amount of time there, I was ready for my check. It was bustling and busy, so I asked the maitre 'd to help me out. He said, "Oh no, you can't leave without having dessert!" I replied that I would love to but that I really needed to go. I think he recognized that the real issue was I couldn't afford the additional $8. He said, "Please, wait one more minute." Just then, a server swooped in and placed the most beautiful and perfectly browned creme brulee in front of me. The maitre 'd gave me a big smile and said, "Bon appetit on me." It was the most delicious creme brulee I had ever had.

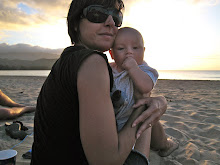
So I had to keep going back. It was the first place I had oysters (thanks to my dad) and a dirty martini. It's where we went after we got engaged - and fulfilled my dream of ordering Le Grand (their three tiers of unbelievably delicious shellfish). And when we went back this summer for the sale of our Brooklyn Heights apartment, that's where we went to celebrate, taking little Balthazar for his first visit. (See picture to the left.) They didn't seem particularly impressed when we told them his name. I'll let that slide.

Since Damien's homecoming was a somewhat special occasion (sure he travels a lot, but I'll have the ability to sleep in a little bit longer so that makes it a special occasion) I decided I should go to The Balthazar Cookbook. And boy, oh boy was it AMAZING!

I decided to make the Shrimp and Roasted Red Pepper Risotto. Now, this was not the easiest thing in the world to make and I must give a special shout out to my baby without whom I would not have my newly muscular arms that enabled me to endure the incredible amounts of stirring it required. It is quite labor intensive, but it was so worth the effort.

Here is the recipe (adapted, of course, from The Balthazar Cookbook):


Shrimp and Roasted Red Pepper Risotto a la Balthazar

Start by making roasted red peppers a few hours before you are to start making the risotto. For this you will need:
6 red peppers
olive oil
salt

Preheat the oven to 400 degrees. Split and remove the seeds for the peppers. Slice the peppers into 1 inch strips. Lay them on a cookie sheet, peel side up, and brush the peels with olive oil. Sprinkle them with salt. Place in the oven and cook for 40 minutes or until the peppers are turning black.

Remove from the oven, put the peppers in a bowl and cover with plastic wrap. When they are cool enough to handle, peel the peppers. They should come right off. Set aside or put in the refrigerator.

You can also prepare chicken stock at this point, however, I did not have time for that so I did the awful thing of buying canned chicken stock (I'm so sorry Keith McNally). Next time I make a chicken, I'll try making my own.

Now for the risotto, you'll need:

6 cups of chicken stock
6 roasted red peppers (from above)
30 medium shrimp, peeled and deveined
salt and pepper
4 tablespoons of olive oil
2 tablespoons unsalted butter
1 medium yellow onion, finely diced
2 garlic cloves, pressed or minced
2 cups Arborio rice (Italian risotto rice, regular rice will not do)
1/2 cup white wine
3 scallions, cut into 1/4" rings on a bias
2 tablespoons fresh basil, chopped finely
1/2 cup grated Parmesan cheese

Heat 5 cups of the chicken stock over a medium low setting until it simmers. Lower the heat to the lowest setting to keep warm.

In the meantime, cut the roasted peppers into large chunks. In a small saucepan, combine them with the other 1 cup of chicken stock and bring to a boil. Lower the heat to a medium low setting and cook for 10 minutes. Put the mixture in a food processor and blend for a few seconds - until smooth, but a few small pieces of pepper remain.

Dry the shrimp with paper towels and season them with a little salt and pepper. Heat up 2 tablespoons of olive oil in a large frying pan until hot but not smoking. Saute the shrimp (in a single layer) until just cooked through (about 1 1/2 minutes per side). Remove from pan and set aside.

In a big saucepan or dutch oven, melt the butter with 2 tablespoons of olive oil over a medium-low heat. Add the onions, garlic, and a sprinkling of salt. Cook, stirring frequently, until the onions are translucent and soft (about 2 minutes). Add the rice and stir to coat the grains with the butter/oil and to lightly toast them (about 2 minutes). Add the wine and stir until it is fully absorbed into the rice (about a minute.)

This is where you'll need the endurance. You'll be adding the warm chicken stock to the rice in 1/2 cup increments. After each addition, stir constantly until the liquid has been fully absorbed into the rice. Then add the next. This will take about 20 minutes, maybe more. Towards the end, start tasting the rice to make sure it has not become too soft. It should still be al dente after the last addition. After the last 1/2 cup has been fully absorbed, stir in the scallions.

Then start adding the red pepper puree. You will add this in three increments, stirring constantly and letting it fully absorb before adding the next. Again, keep tasting the rice to make sure it is not becoming mushy.

When the puree has been absorbed and the rice is at it's perfect consistency, stir in the shrimp, basil and Parmesan. Sprinkle a little more salt and pepper to taste.

This risotto is best served immediately with an additional sprinkle of Parmesan. Bon Appetit!!!

It was seriously some of the best risotto I've ever had (if I may say so myself. Actually, Damien said so, too.) The stirring was made less painful by the couple of glasses of wine I drank as I cooked : )

In the cookbook, they explain a way to partially cook the risotto so that you can prepare it to a certain point and finish it later. I find this helpful because there is really no way you could prepare this for a dinner party, unless you don't mind spending the whole time in the kitchen stirring risotto while everyone else is drinking wine and having a good time.

Now, as if this weren't enough for my hardworking husband's return, I went a step further. I made THE BEST CREME BRULEE EVER, also from The Balthazar Cookbook.


Creme Brulee
(adapted from The Balthazar Cookbook)
2 cups heavy cream
1/4 cup sugar
1 vanilla bean (split and with the seeds scraped free from the bean)
1/2 stick cinnamon
5 large egg yolks

Preheat the over to 300 degrees.

In a saucepan, combine the cream, sugar, vanilla bean and seeds, and cinnamon stick. Bring to a boil over medium heat, watching carefully so that it won't boil over (which it is wont to do if you are not careful.) Put the mixture into a glass measuring cup (because it has a spout.)

Prepare an ice bath in a large bowl. In a bowl that will fit into the ice bath (but not yet), lightly beat the egg yolks with a whisk. Begin adding the hot cream to the yolks, in a very light stream and whisking constantly so as not to cook the egg yolks. Cool the bowl down by placing it in the ice bath. Let it cool until room temperature (about 30 minutes.)

Once cooled, pour the mixture into individual ramekins nearly to the top. Balthazar uses 4 inch shallow dishes because in the end, after you have created the sugar crusted top, you get the perfect ratio of crunch to cream. Since I don't have those, I used a deeper, but smaller ramekin. This made 4 servings.

Place the ramekins in a large baking pan. Fill the pan with warm water until it reaches halfway up the ramekins. Cover the whole pan with aluminum foil and carefully place in the oven.

Cook the custard for 45 minutes. You'll know it's ready because the custard is set and firm when you jiggle the ramekins.

Let the ramekins cool a bit and then put them in the refrigerator for at least an hour.

When you are ready to serve, create the crisp sugar topping. You will mix 2 tablespoons of brown sugar with two tablespoons or regular granulated sugar. If your brown sugar is moist, put the mixture in a 250 degree oven for 15 minutes to dry it out. Then put the sugar in a food processor and mix.

Evenly sprinkle a layer of sugar over each serving of custard, making sure to get all the way to the rims. You can use a kitchen blowtorch or you can cook it under a broiler for about 2 minutes or until the sugar is brown and bubbly. Then sprinkle a second layer of sugar over them and repeat. I wish I had a blow torch because one of my favorite things about Balthazar's creme brulee is the warm crispy top over the cool custard. Broiling it heated up the custard too.

Regardless, it was delicious! I also have to tell you that the vanilla bean was sort of difficult to find and was wicked expensive (one bean costs me $7) so I suddenly don't feel like the $8 price tag at the restaurant is that outlandish. But, making it at home had the added bonus of being served so incredibly fresh. While the complimentary dessert I got at Balthazar on my first visit will always hold a special place in my heart, the creme brulee I made for Damien's return has now replaced it as the best creme brulee I've ever had.

Friday, September 4, 2009

Soy Ginger French Cut Lamb Chops

I can't really write too much today because I've run out of time, but I did want to pass on my recipe for tonight because it was really good.

And the best part - I used the cast iron skillet! It was the first time since the I got the $314. 58 fine letter because of the Smokin' Steak incident. But this time, no smoke. And the lamb chops were delish.

Soy Ginger French Cut Lamb Chops

6 - 8 french cut lamb chops (depending on size and your hunger!)
2 tablespoons olive oil
2 cloves garlic, pressed
2 tablespoons soy sauce
1 teaspoon ginger
juice from 1/2 lime
1 teaspoon salt
1 teaspoon pepper

Put the chops in a 1 gallon sized zip lock bag. Add the olive oil, garlic, soy sauce, ginger, lime juice, salt and pepper. Shake the bag until all the ingredients are mixed well and until the chops are completely coated. Place in the refrigerator for at least 1 hour but no more than 2 hours.

I served them with some yukon gold mashed potatoes and sauteed spinach (with a bit of garlic).

Monday, August 24, 2009

Salmon and Asparagus Linguini Alfredo (aka Heart Attack in a Bowl)

Having gotten over my cooking fiasco from Friday, I jumped back into the saddle tonight with a new meal. Publix was having a sale on Coho Salmon that looked really good, so since I had to go there to buy some milk, I bought a pound and had to figure out what to do with it.

I was also craving pasta, so I decided to make the linguini I bought at the Argentine pasta shop down the block. And I thought if I could make some sort of alfredo sauce to go with the salmon and some asparagus, well, that just sounded pretty good to me.

So here is my recipe (it looks more complicated than it is; total cooking time is about 30 minutes):

Salmon and Asparagus Linguini Alfredo
2/3 pound fresh linguini
1 pound salmon fillets (although a little less would be fine too)
4 tablespoons olive oil
2 cloves garlic
salt and pepper
1 small onion, diced
10-15 spears of asparagus, cut into 1 inch pieces
1 pint heavy cream
1/2 stick of butter
1 cup grated Parmesan cheese
1/4 cup chopped parsley

Boil a large pot of water for pasta. But do not cook pasta until the very end.

Rinse off the salmon fillets and pat dry. Coat with 2 tablespoons of the olive oil. Press two garlic cloves on the salmon and rub in evenly. Sprinkle with a light coat of salt and pepper.

Heat the other 2 tablespoons of olive oil in a saute pan. Add the onions and asparagus and saute until the onions are translucent and the aspargus is just tender. Put the cooked vegetables in a bowl on the side.

Using the same pan, cook the salmon fillets. Start with the skin side down. When you flip the salmon, peel off the skin and continue to cook until cooked through. This take about 8 minutes depending on the thickness of the salmon. When finished, remove from pan and set aside.

In a clean saute pan, heat up the heavy cream over low to medium heat. When it just starts to bubble, add the butter and whisk together until butter is fully melted. Add the cheese and continue to whisk until cheese is blended in completely. Add in salmon - breaking it up with your fingers as you put it in the pan - and vegetables and coat with cream sauce. Stir in fresh parsley. Sprinkle with black pepper to taste.

Add the pasta to the boiling water. If using fresh pasta, cook for 3 or 4 minutes. Drain and serve in individual bowls.

Serve the salmon and cream sauce over the pasta.

Not to toot my own horn here, but it was pretty freakin' tasty. Okay, so you might have to go straight to the hospital and have your arteries cleaned out after this meal. But, before you go, don't forget to have a glass of wine. We opted for a Sancerre that we've been saving for a special occasion even though tonight wasn't a particular special occasion.

The wine was actually part of my fabulous anniversary gift from Damien (which was at the end of May.) He bought me several bottles of wine that commemorate special moments in our marriage. So, there was a pinot noir from the Anderson Valley from a weekend we spent near there when I first moved out to San Francisco. There was a Provence rose because I started drinking rose after a great night we spent out at Pearl Oyster Bar where we saw Jodi Foster drinking it and decided to try it ourselves. There was a trebbiano like the cheap, but good wine we used to get at our favorite Italian restaurant in Brooklyn, Noodle Pudding. And the sancerre, which... well, we just like Sancerre and order it on special occasions.

I guess the special occasion tonight was that Damien proclaimed the alfredo sauce the best he ever had. I'll drink to that!

Friday, August 14, 2009

Pork Chops with Mango Chutney...delicious!


Tonight I made use of those pork chops I took out last night. And boy, did they turn out to be delicious! In a nod to my new half-Indian nephew, I made a mango chutney to go with the chops. It is fantastic. Spicy, but the perfect compliment to the pork.

For the mango chutney, I pretty much followed a recipe I found on the Food Network's web site by Alton Brown. Now, I am not a big Food Network watchers, but I really like Tyler Florence's Ultimate Chili recipe so I thought I'd give this a try. I made couple of adjustments and I didn't really measure my ingredients too perfectly, but it turned out great. Very spicy, but great!

Check out the Alton Brown recipe here. (Not sure if there are copyright issues for reprinting so just follow the link.)

Some of the thing I changed:

1. I probably used less mango than it called for, but it was fine. I only had one mango.
2. I didn't use macadamia nuts because I just didn't have any and I didn't really want nuts.

Once I was finished cooking, I did to the ice water bath to cool it and I put it in the refrigerator for a few hours.

Then I made the pork chops themselves. I hate how pork chops sometimes end up so dry, so I tried to use a brine to tenderize them. So, I used this:

Pork Chops in Orange Brine
4 cups orange juice
1 cup apple cider vinegar
1 cup brown sugar
2 tablespoons salt
1 tablespoon pepper
2 tablespoons olive oil

I combined all the ingredients in a gallon-sized ziplock freezer bag. Add the pork chops and make sure that they are coated with the brine. Put in the refrigerator for 2 hours.

When you are ready to cook them, preheat the oven to 350 degrees. Remove the chops from the brine and pat dry. Sprinkle a little more salt and pepper on each side of the chops. Heat up olive oil in an oven proof frying pan. When the oil is nice and hot, place the chops in the oil. Brown both sides well, only flipping them once. (This should be about 2 or 3 minutes per side.)

Once the chops are browned, place the pan in the oven to roast the chops for about 15 minutes. If your chops are pretty thin, you might want to check them sooner. If they are thick, it might take up to 30 minutes to cook through. They should be very slightly pink inside.

I served the chops with a side of whole wheat cous cous that I made out of a box. I love this side dish since it is super easy and fast. After you boil the water, it only takes five minutes for the cous cous to be ready. I also served a side of asparagus. I probably could have found a more Indian vegetable, but oh well. Asparagus is just so tasty.

And I have to say, the brine worked. Even though my pork chops were slightly more cooked than I had hoped, they were tender and juicy. Not the cardboard I usually make.

Anyway, it turned out terrifically and I highly recommend the mango chutney. It made the whole meal more exotic and exciting.

Today is my birthday, so I don't think I am going to cook for myself. And if Damien doesn't make me my favorite birthday cake - chocolate cake with vanilla frosting covered in coconut - then I just might have to make it myself : )

Monday, August 10, 2009

Honey Soy Glazed Salmon


Tonight is very special. For one thing Damien is cooking for me. He is making his famous Honey Soy Glazed Salmon which is really spectacular.

And then, the other more exciting news is that I became an aunt today for the very first time. My brother, Raul and his beautiful wife, Meera welcomed their first son this afternoon and the whole family could not be prouder. I'll leave the details for later, but mom and baby (and dad, of course) are doing great.

Let's get back to the recipe now. Damien found this recipe on epicurious and adapted it to suit our taste.

Honey Soy Glazed Salmon
3 tablespoons honey
2 tablespoons soy sauce
fresh lime juice of one lime (should be about 2 tablespoons)
2 teaspoons Dijon mustard
1 tablespoon water
dusting of flour
2 teaspoons vegetable oil
1 pound salmon fillets

Put honey, soy sauce, lime juice, dijon mustard and water in a plastic container with lid. Shake the container to mix well.

Remove the skin from the salmon and dust both sides of the fish with a little bit of flour.

Heat up the vegetable oil in a skillet big enough to fit the salmon. Heat the oil on high heat until the oil is hot but not smoking. Place the salmon fillets in the skillet and cook until they are golden brown and cooked through which should take about two or three minutes on each side. Remove the fillets from the skillet and put aside.

Pour the honey soy glaze mixture into the skillet and simmer for one minute. Pour the glaze over the salmon.

Tonight Damien served with a side of string beans (I know, we eat a lot of string beans) and some coconut rice which was a bit of an experiment that generally worked.

Here is how we made it:

Coconut Rice
1 cup water
1 cup coconut milk
1 cup rice
2 tablespoons shredded coconut

Bring the water and coconut milk to a boil. Stir in the rice and shredded coconut and return to a boil. Lower heat to low setting and cook for 20 minutes.

Next time I think we will use coconut water instead of coconut milk. I also think we will try and toast the coconut in a bit of butter in the pot before we add the water and coconut water. And we should maybe try using jasmine rice next time, too.

We also drank a glass or two of Verdejo, a white Spanish wine, that went perfectly with the sweet dish.

It was a delicious dinner and I thank Damien for making it. I also thank him for cleaning up after himself.

Friday, August 7, 2009

Chicken Cordon Bleu - Diana Style

First of all, I need to take two boneless, skinless chicken breasts out of the freezer right now before I forget. They're defrosting in the refrigerator. Now I can relax.

Damien is coming home tonight which makes me happy. I had a busy couple of days so it wasn't too bad, but I miss him and wouldn't mind having a little back-up for the boy. Baz slept great the first night Damien was gone, but last night he woke up at about 1am. I tried to let him fall back to sleep on his own, but after about 10 minutes I went in there and discovered he had peed through his diaper and pajamas and was really in a state. So, I cleaned him and cuddled with him for a few minutes before putting him back to bed. He was alright after that. Well, until about 7:10am.

In honor of Damien's return, I thought I'd make one of his favorite old stand-bys. I like to call it Chicken Cordon Bleu, but since I use prosciutto and fresh mozzarella instead of regular ham and swiss cheese, I guess it's not really chicken cordon bleu.

Regardless (or irregardless, as they say in Massachusetts) it's simple to make and sort of impressive looking. Here's how I do it:

Chicken Cordon Bleu - Diana Style
2 boneless, skinless chicken breasts
1/4 cup of flour
1 egg
2 tablespoons of milk
1 cup Italian breadcrumbs
4 slices of thinly sliced prosciutto
2 - 1/4 inch slices of fresh mozzarella
1 tablespoon butter

Preheat the oven to 350 degrees. Cut the chicken breasts lengthwise so that you can fold them open to stuff. Beat the egg with milk until frothy. Coat the chicken breasts with a light layer of the flour. Then dip the floured chicken breasts in the egg mixture. Fully coat the egged chicken breasts in the Italian breadcrumbs both on the outside and inside the split.

Lay the chicken so that they are butterflied. Place two slices of prosciutto inside the fold of the chicken breasts. Then place one slice of cheese on each breast. Fold the chicken breasts so that they are now stuffed with the prosciutto and cheese.

Place the two chicken breasts in a baking dish small enough to keep them assembled. Cut a pat of butter for each breast and place it on the top center of the breasts.

Cover the chicken with aluminum foil, loose enough so that it does not touch the top of the breasts. Cook in the oven for 20 minutes. Remove the foil and cook for 5 more minutes. (The cooking time can vary a bit depending on the thickness and defrosting status of your chicken. You might need a few more minutes than this. I did tonight.)

While the chicken is cooking, I make the Chicken Seasoned Rice that I also made to go with the Chicken with Mango and Peach Salsa. And I also make a steamed vegetable - Tonight I think I'll make steamed string beans sauteed with a little bit of garlic.

It's really simple and delicious. Damien's gonna love it especially if I follow it up with some Haagen Dazs Dulce de Leche and Caramel Cone ice cream.

Monday, August 3, 2009

Miso Glazed Chilean Sea Bass

Once upon a time, Damien and I were the type of people who would show up at a restaurant like Nobu on a random Wednesday or Thursday night to splurge on a fabulous meal. During one such visit, I discovered Miso Glaze. Wanting to try something besides the wonderful sushi there, we asked the waiter for a suggestion. He highly recommended the Miso Glazed Black Cod. Not being the biggest cod fan, I wasn't so sure about it, but he REALLY loved it. So, we ordered it.

Well, it was just about the best thing I've ever eaten. And it turns out black cod is actually sablefish which is not really a part of the cod family at all -- although I have come to appreciate cod as well. But, that's beside the point.

Now life has changed and I don't get to make last minute decisions like that night not very long ago. Instead I make it myself for a romantic dinner at home or to impress friends. Turns out that if I plan a little ahead and can find the ingredients, it's freakin' easy to make.

Here's how I do it:

Miso Glazed Chilean Sea Bass
1/3 cup saki - or maybe a little more : )
1/3 cup mirin
1 cup miso paste
2/3 cup sugar
1 pound Chilean Sea Bass

The hardest part about this recipe is finding the ingredients. Mirin is a sweet Japanese cooking wine that I have been able to find at regular grocery stores. And sake can be found at most liquor stores. The miso paste can be a little more challenging if you live outside of large metropolitan areas. I buy it at Whole Foods, but when I lived in New York, they carried it at my local bodega and at Fresh Direct. It is often kept in the refrigerator section with other soy products, like tofu.

Once you've found all of your ingredients, it's quite simple. In a medium saucepan, bring the saki and mirin to a boil. Let it boil for 20 seconds to let the alcohol evaporate. Remove from heat and add the miso paste stirring it so that it will dissolve in the liquid. Put it over low heat if the mixture cools too much and the miso stops dissolving. Once it is smooth, put the pot back on the high heat and return it to a boil, stirring it constantly so it won't burn. Slowly add the sugar, stirring well and letting the sugar dissolve. The mixture will start to look a bit shiny, like a glaze. Remove from heat and let the glaze cool to room temperature.

This recipe makes enough miso glaze for about 1 pound of fish.
You can use this with all sorts of different fish but the black cod works particularly well as does regular cod. But, I found some frozen Chilean sea bass at Costco the other day, so I am going to make it with that. It has as similar texture and subtle flavor that's quite good for the glaze.

Pat the fish dry with some paper towels. Place the pieces in a one gallon size, ziplock freezer bag or some other non-reactive container that will fit in your fridge. When the miso glaze has cooled to room temperature, pour the the glaze over the fish in the bag. Make sure the pieces are fully coated. Zip up the bag and put it in the refrigerator to marinate. The longer the better. I'm talking two or three days. But, if you can only do one, well, that's okay. It'll still taste good.

When you are ready to cook it, preheat the oven to 400 degrees and heat up an oven proof pan on your stove top. I use the All-Clad pan I got for our wedding. Heat the pan over high heat until it is very hot. Remove the fish from the bag a let the excessive glaze drip off of it. Place the fish in the pan and sear it for a few minutes on one side only.

Once the fish is seared on one side, put the whole pan in the pre-heated oven. Cook the fish for 10 or 12 minutes.

I like to serve the fish over mashed potatoes with a side of steamed asparagus. Even better, make the mashed potatoes with a little bit of wasabi in them. Yummy.

This is definitely one of my favorite meals. It's totally worth the trip to Whole Foods for the miso paste. Just try not to get suckered into all the other delicious-looking but overpriced items there.


**NOTE: Miso Paste lasts, like, forever. Okay, so really about a year. But, since it is a pain to find this is good because you can buy a big container of it and keep in your fridge for those days when you are craving a little miso.